Five reasons I use kldload
A personal note on why this is my daily-driver Linux.
I built kldload to make OpenZFS on Linux easy enough that anyone — including me — could run it without spending a quarter on configuration. ZFS is enterprise storage with many years of hardening on BSD and Solaris. Linux is the ecosystem I already work in. Getting the two to work together properly takes record sizes per workload, ashift per disk class, compression by access pattern, primarycache tuning, snapshot policy, encryption keys — months of getting things wrong before getting them right. kldload does that configuration once, ships it pre-tuned, and gets out of the way.
The substrate is delivered to the target on install. What you assemble on top is up to you.
Five sections below. Each one is a thing I actually do with this tool, often, and a reason I keep reaching for it.
1. The bootstrap tier is obsolete
The substrate is running before any workload boots.
Storage, networking, observability, security, and GPU compute are kernel-resident on every kldload host. When the first workload starts, the platform has already been running for seconds. There is no per-host agent install, no per-pod sidecar, no cloud-init bootstrap of a monitoring stack. The first packet from a new VM is already labelled by identity in the BPF datapath. The first syscall already shows up in Tetragon. The first block I/O already shows up in the latency heatmap.
I build and tag a playbook plus any tasty bits, and the workload comes up fully running on first boot — ready to serve, no agent to register, no sidecar to spin up, no mesh to configure. And now you can too.
See: kernel vs userland · how things work · features · postinstallers
2. One USB — the install procedure is also the repair key
Pick the distro at boot. Fifteen minutes to a working kldload box. Ten minutes to rebuild it if everything I own goes “poof.”
I plug the USB into any machine I want to repurpose. Pick the distro at install — Debian, Ubuntu, CentOS Stream, Fedora, RHEL, Rocky, Arch, Alpine. The base distro is on disk in 2-3 minutes. The full kldload stack — ZFS on root, WireGuard, observability, a klab cluster — finishes in about 15 minutes. Same USB doubles as a live GNOME desktop if I don't want to commit. Reboot, nothing of mine stays behind.
I use it often. Some days are Debian, next is Fedora 44, Fridays are Red Hat day — built fresh. OSes around here rarely last more than a couple of months before one gets nuked. That's not a failure mode — that's the operating model. Reboot, click through the installer, ten minutes later I'm in something else running the same kldload tooling.
The question that keeps people up at night
What if my entire infrastructure suddenly went “poof”? Not a server — everything. The HA zone fails, the cloud provider has an incident, ransomware takes out primary AND backup, someone runs rm -rf on the wrong host. Every running machine, every disk, every configuration that lived in someone's head — gone. Maybe my very existence as a company depends on getting that back.
For most companies the honest answer is months, possibly out of business. Restore-from-backup assumes the backups survived, are recent enough to matter, and reconstitute into something that actually runs. None of those are guaranteed. Most DR plans don't survive their first real outage because nobody's tested them.
The kldload answer is about ten minutes, and it doesn't depend on any of the infrastructure that just got destroyed. The USB I keep in my pocket isn't just an installer — it's also my repair key.
What that looks like, measured
These aren't aspirational numbers — they're wall-clock measurements on a kldload box running build #50, demoed in real time:
If destroying a Kubernetes cluster takes 20 seconds and rebuilding it from scratch takes 5 minutes — on the same procedure I used to install it the first time — my disaster recovery isn't a binder, a vendor contract, or a thing I'm afraid of. It's a Tuesday.
And these are real qemu-kvm virtual machines, not Docker containers. Real kernels, real isolation, different distributions per node if I want. The thing that lets kldload move this fast is the substrate underneath — ZFS clones, RAM-resident live env, format-agnostic export — not a clever orchestrator on top.
I sleep well at night
The USB doesn't just install kldload. It also exports it — kexport produces qcow2, vmdk, vhd, OVA, raw, or AMI/Azure/GCP-ready images. The recovery procedure is: walk to any computer, plug in the USB, pick the template that matches what was lost, pick the destination format for wherever I'm rebuilding into, hit Export. dd the result back onto the same USB (the live env runs from RAM, doesn't care that I'm overwriting its own boot media). Upload to the provider, boot. About an hour later, the infrastructure shape is back.
The data side — that's still my syncoid → survivor site ZFS replication's job. The USB rebuilds the shape; the state has to come from somewhere that survived. But the shape is the part that usually takes weeks. Once the shape is back, restoring state is a ZFS receive, which is bounded by network throughput, not procedure overhead.
That's the “repair key” story. One stick, in my pocket, that says: if anything goes wrong, I have a ten-minute path back to a running infrastructure. Not perfect — I might lose minutes of data if replication was lagging — but bounded and tested. The procedure I use to recover is the same procedure I used to install in the first place, and the same procedure I use to spin up test environments. Every USB burn is a rehearsal of my DR plan.
That's why I sleep well at night. :)
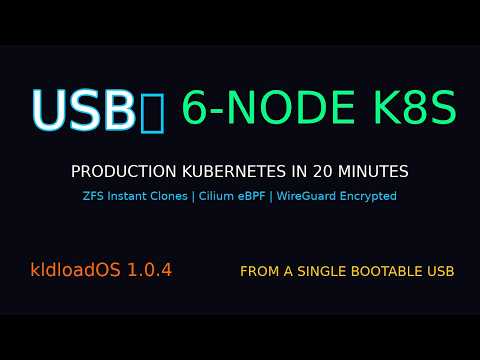
Deep dive: Disposable Infrastructure masterclass · Backup & DR · download · multi-site cloud
3. KVM + ZFS — the assembly factory
A passive tool that clones or assembles on command.
kldload sits idle, waiting. The tooling is already on disk: kvm-create provisions a VM on a ZFS zvol, kvm-clone makes an instant CoW copy, kvm-snap captures state, kvm-list shows what's running, kvm-delete tears the whole thing down — zvol included. When I ask, a new VM gets assembled as a ZFS clone of a golden — sub-millisecond, because ZFS clone is a metadata operation. The instance is delivered to libvirt fully formed, ready to boot. Destroy it and the dataset returns to the pool. Spawn ten environments in seconds, throw them away the same minute, spawn ten more.
Clones cost zero bytes until they diverge from the parent. A 20 GB golden cloned ten times consumes 20 GB on disk, not 200 — only the writes each clone makes get their own blocks. Throwing away and respawning is genuinely free at the storage layer; the disk pressure of running ten variants is the disk pressure of running one, plus the tiny delta each one writes. That's what makes "distro of the day" or "spin up a fresh cluster for every test" actually practical.
This is not a production-hypervisor pitch. It is the workstation that makes test, lab, and dev work fast. The default state is idle, waiting to clone something. The ZFS test lab is the canonical example: building and configuring a clean OpenZFS test across every supported distro traditionally takes several days of manual setup; on kldload it runs end-to-end in about 8.5 hours with zero drift between runs.
That same property makes parallel environments practical for anyone — migration rehearsals, A/B configuration tests, side-by-side comparisons, snowflake debugging. Engineers can understand and fix snowflakes with haste because cloning the production weirdo is free: copy it, poke at the copy until you find what makes it weird, fix it, throw the copy away.
Designed for bare metal. The kvm profile assumes direct disk access. NVIDIA support is included — passthrough to a single VM or shared across container workloads — see the NVIDIA & GPU masterclass for the mechanics. Nested KVM probably runs — I haven't tested it extensively — but the sub-millisecond clone numbers depend on real ZFS-on-disk; nesting stacks two CoW layers and the speed claims aren't guaranteed. Run it on metal for the experience this page describes.
See: KVM masterclass · NVIDIA / GPU · beginner: clone a VM · automation · homelab cloud · game servers
4. In-kernel storage — and what “data storage” collapses into
ZFS in the kernel + WireGuard in the kernel = the userland storage tier goes quiet.
ZFS is in the kernel. WireGuard is in the kernel. The data lives on the kernel-resident filesystem, and the mesh delivers access to it from any machine you've joined to it.
# Snapshot — O(1) regardless of dataset size
zfs snapshot rpool/home@before-experiment

# Roll back to that moment — O(1), atomic, no restore workflow
zfs rollback rpool/home@before-experiment

# Backup policy — sanoid applies retention from cron
cat > /etc/sanoid/sanoid.d/home.conf <<EOF
[rpool/home]
  use_template = production
EOF

# Off-site replication — block-level incremental, over the WG mesh
syncoid rpool/home backup-host:backup/home

# Mount from your laptop on the mesh
mount -t nfs kldload-home.mesh:/home /mnt
Every line above is a kernel feature or a 30-line config file. The backup software, the off-site replication subscription, the file sync service, the snapshot manager, the NAS appliance, the encryption-at-rest product, the disaster-recovery tool — on a kldload box, those collapse into the lines you just read. They aren't a separate product category. They are how the filesystem already works.
The concept of "data storage" changes on this platform. I decide where the bytes live; the rest of the estate is built on top of that storage. Native WireGuard makes the same bytes reachable from anywhere on my mesh. Native eBPF makes every read and write visible without an agent in the workload. The storage isn't somewhere data goes — it's the foundation everything else sits on.
ZFS manages the whole filesystem as one cohesive entity, with permissions and capabilities at the dataset boundary: per-dataset native encryption, dataset-level quotas and reservations, fine-grained NFSv4 ACLs, integrity checksums on every block, atomic transaction groups. I can replicate ciphertext to a peer that doesn't have the key — the receiving host stores the data without ever decrypting it, and ZFS still verifies block integrity end-to-end. That's a primitive nobody ships in stock Linux.
Many years of hardening on Solaris and BSD, now usable on Linux without fighting the package manager. Free. Resilient. Primitive-rich enough that the storage tier as a shopping category quietly stops being something I think about — that's a game changer for what Linux storage costs and what it can do. It's why I run ZFS on root, and why I always build my own storage solutions.
A concrete example: cheap cloud VMs aren't a vendor relationship for me anymore — they're just somewhere I park my data. Rent the smallest tier with a big attached volume, install kldload, join the WireGuard mesh, syncoid into it from home on a cron. The cloud becomes raw block hardware I happen to rent, not a service I subscribe to.
Build the mesh however you like — peer endpoints go in the web UI or answers.env. The mount example above assumes the laptop has joined the mesh.
See: beginner: snapshots · beginner: replication · backup & DR masterclass · NAS server · dRAID storage · Plex on ZFS · build ZFS from scratch
5. Observability — every packet, every syscall, every block I/O
Kernel-resident metrics, pre-wired. Self-contained or augment what you have.
Prometheus, Loki, Grafana, eBPF exporters, Tetragon, and Hubble are pre-wired on every install. Every flow across the cluster is decoded with workload identity from the BPF datapath. Every syscall in every container is captured with full process tree. Every block I/O appears as a per-request bucket in the latency heatmap. The data is structured, queryable locally, and exportable to whatever you already use — Splunk HEC, OpenTelemetry, Prometheus remote-write — without an extra agent per host.
Metrics are emitted before you even log in. Newly-spawned VMs start being captured at zero seconds: the moment the network namespace exists, the first packet is already labeled in the BPF datapath; the moment a container starts, the first syscall is already in Tetragon's stream. No agent to install, no controller to register with. The dashboard catches up within the next scrape cycle — five to fifteen seconds — so a box that didn't exist sixty seconds ago is on every dashboard before its login prompt finishes painting.
No external observability stack is required. The dashboards work disconnected. kldload doesn't phone home, doesn't require a SaaS connection, doesn't have a license check on startup. If you already have Splunk / Dynatrace / Datadog, kldload sits alongside as a structured data source, with the operator controlling what gets shipped to the expensive tier.
A typical host emits 50–500 GB/day of raw kernel activity if scraped naively. Pre-aggregated to Prometheus metrics and sampled events, the same operational fidelity is 50–500 MB/day — three orders of magnitude smaller. Smart reporting is not hard, and it's worth the development cost. The substrate is the hard part, and it's already done.
And from the terminal: the kldload-console. I got bored of tracking down networking problems the long way, so I built it. tmux, organized by concern instead of by program. Press one F-key and the whole panel becomes a live view of one kernel subsystem:
F1   help overlay (cheatsheet + system identity)
F5   disk     — biosnoop, biolatency, fileslower, zfsdist
F6   syscall  — exec, open, kill, syscount, capable
F8   cilium   — agent status, lb-map, netpol, bpf-maps
F9   top      — htop, k8s-top, zpool-iostat, bpf-prog
F11  tracing  — hubble flows, tetragon events, kernel ring buffer
Each cockpit is curated bcc-tools, cilium, and tetragon streams already filtered and colour-coded. F5 shows every block I/O. F11 shows every TCP flow and every syscall as they happen. Same keybindings on every install, drift-free across all nine distros, over SSH, in a tmux session I can detach and re-attach. When I SSH in to debug something, I press F11 and I'm already looking at what's happening at kernel resolution. (Side benefit: the default tmux config is finally user-friendly — F-keys instead of Ctrl-b prefix gymnastics.)
See: seeing the kernel · how services talk · observability masterclass · eBPF masterclass · platform tools
Full builds, end to end
Fourteen recipes on the site walk through complete deployments — storage, hypervisor, observability, application — for the patterns above.
Browse the recipes →Who this is for
- Engineers who want to learn ZFS on a stable base install.
- SREs who want a workstation that clones, snapshots, observes in seconds — not minutes per workload.
- Teams that need to cross-distro test and build software quickly.
- Operators tired of the userland tax: agents, sidecars, cloud-init bootstraps of platforms that should already be there.